How to Fix a Torn Speaker Surround [Step By Step Guide]
Learning how to fix torn speaker surround is always very important, especially when you own one at home. It will save you from hiring experts, making you save on the maintenance cost of your speaker.
This write-up presents the steps you can follow to fix a torn speaker, suitable for beginners and experts.
How to Fix a Torn Speaker Surround
By following these steps, you can make the repair process easier and faster. You’ll also learn how to avoid common problems that can occur during speaker repairs, so you can improve your audio quality and reliability.
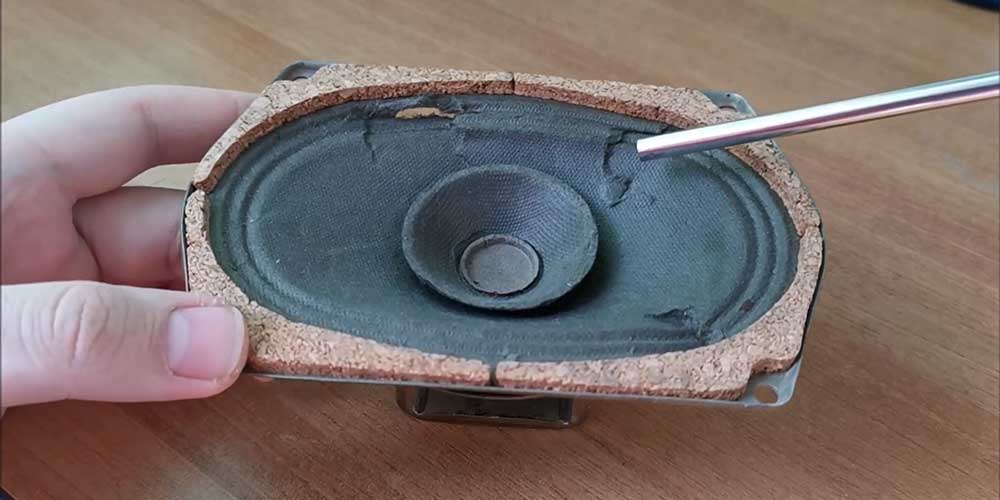
Step 1: Assess the Severity of the Damage
Assessing the severity of the damage will help you come up with ways in which you can repair it. It will also make you know whether the damage is beyond your repair. If the damage is just a small cut, you may use an RTV silicone to seal and close the cut.
However, when the cut is too broad, you may need other materials for scaffolding apart from just an RTP silicone. The scaffolding materials are usually used when the rubber chunk is wholly damaged or missing from the speaker surround.
Step 2: Remove the Screws
Using your cordless driver or screwdriver, unscrew all the eight screws from the speaker. However, when using a cordless driver to remove the screws, you need to be more careful. This is because the cordless driver can trip the enclosure holes or the screws.
Using it carefully will also prevent it from creating a different spot on the surface of the rubber surround. In addition, always assemble the removed screws in one place where you can easily find them when you want to screw. It will also prevent the screws from scattering, making them get lost.
Step 3: Remove the Edge of the Speaker
After unscrewing, you can prop up the edge of the speaker using a screwdriver. You can also use other flat tools like flat blades too. As for me, I usually use my screwdriver with a sharp chisel-shaped edge to remove the edge of the speakers I repair.
When removing the edge, try sliding one or two of your fingers at the bottom of the speaker for you to get a better grip on the speaker’s edge. This should be done when the speaker’s surface is facing up, and the finger should be exactly underneath the speaker.
This will make it easy for you to lift the speaker out of its enclosure. It would help if you also were careful when raising it from the section to prevent interfering with the wires that connect the speaker and the enclosure material.
Step 4: Clean Up the Speaker And Its Enclosure
Clean the speaker and the enclosure using a lint-free cloth to remove any grime, dirt, or grease. This will help prevent them from tarnishing and weakening the bond between the RTV silicone and the rubber when you seal the cut using the RTP silicone.
When cleaning, you should inspect all the speaker parts and the enclosure, including the underside part. After cleaning, you can wear your protective gloves ideally. You can then put the RTV silicone on a plate or a clean surface.
Step 5: Put the RTV Silicone Into the Speaker
Put in the RTV silicone starting with the underside of the speaker. To safely apply it to the speaker, you can cut off the end of the cotton swab, which you can use as the applicator of RTV. You can also remove the swap from cotton to remove any traces of cotton fibbers.
When the swap is free from cotton, you can dip it into your RTV silicon and make it the applicator for putting the RTV silicone into the speaker.
The thin layer will be enough to create a strong bond and perfectly seal the cut.
Step 6: Spread the RTV Silicone Gently Around the Torn Part
You can do this by putting a dab of the RTV silicone on one of your fingers with the gloves worn. You will not need a massive amount of your RTV silicone to create a bond; apply a small amount to form a thin layer.
When using the RTV silicon on the torn part, ensure both your hands are free from dirt. When mixed with the RTV silicone, the ground can lead to a weaker bond that may not be more efficient.
Step 7: Push the Speaker’s Center to Check if the RTV Silicone Has Interfered With the Speaker’s Movement
This will help you detect the presence of the liked RTV inside the speaker. In most cases, when the RTV silicone leaks into the speaker via the torn part, it may impede it from movement.
This will make the speaker less efficient in producing sound. However, when pushing the speaker’s center, be more careful to prevent it from being damaged again.
The best time is when the RTV silicone has fully sealed the torn and strong. In addition, ensure the speaker’s center is facing up before you push it.
Step 8: Direct a Solid And Steady Flashlight to the Repaired Part
When you direct the flashlight to the covered part, it will block light from passing through; therefore, you need to apply the RTV again when you see light rays passing through the hole. However, this step may be optional, especially when you trust your work.
Step 9: Reinstall the Speaker
Now that you have completed the repair, it is time to reinstall the speaker back to its enclosure. Before you begin the reinstallation process, ensure the wires are in a good position. Return the edge of the speaker and use your screwdriver to start screwing back the screws into their work.
Conclusion
Repair a torn speaker surround when the damage is less severe. Following the steps listed in this article will help you cover your torn speaker perfectly without hiring an expert. However, when the damage is beyond your repair, it is safer to hire an expert to assist you in repairing it.